
Homemade Cannabis Bath Bombs
Baths.I’ve always had a love/hate relationship with this sort of cleansing medium, to be completely honest. But I don’t think I’m the only one with complicated feelings towards taking a bath. Ease Away Your Stress With Some Homemade Cannabis Bath Bombs

Yield: 12
Calories:
Cost: approx. $10
Equipment
- Bath Bomb Molds**
- Bowl
- Small glass or measuring cup
Materials
Alright, in order to get things started, you’ll need to assemble the following ingredients:
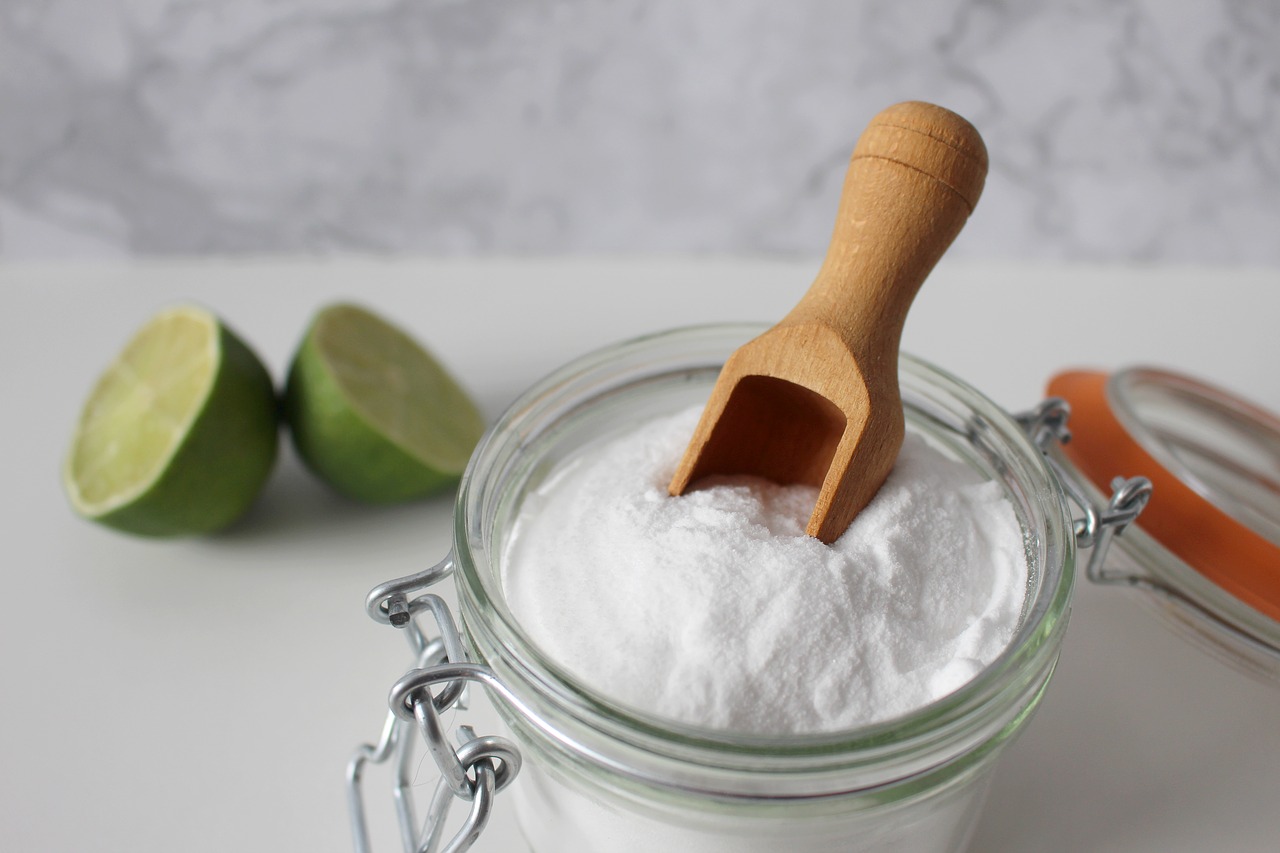
- 4 Ounces Baking Soda
- 2 Ounces Epsom Salt
- 2 Ounces Citric Acid
- 2 Ounces Corn Starch
- 2 Drops Food Coloring (Your Choice)
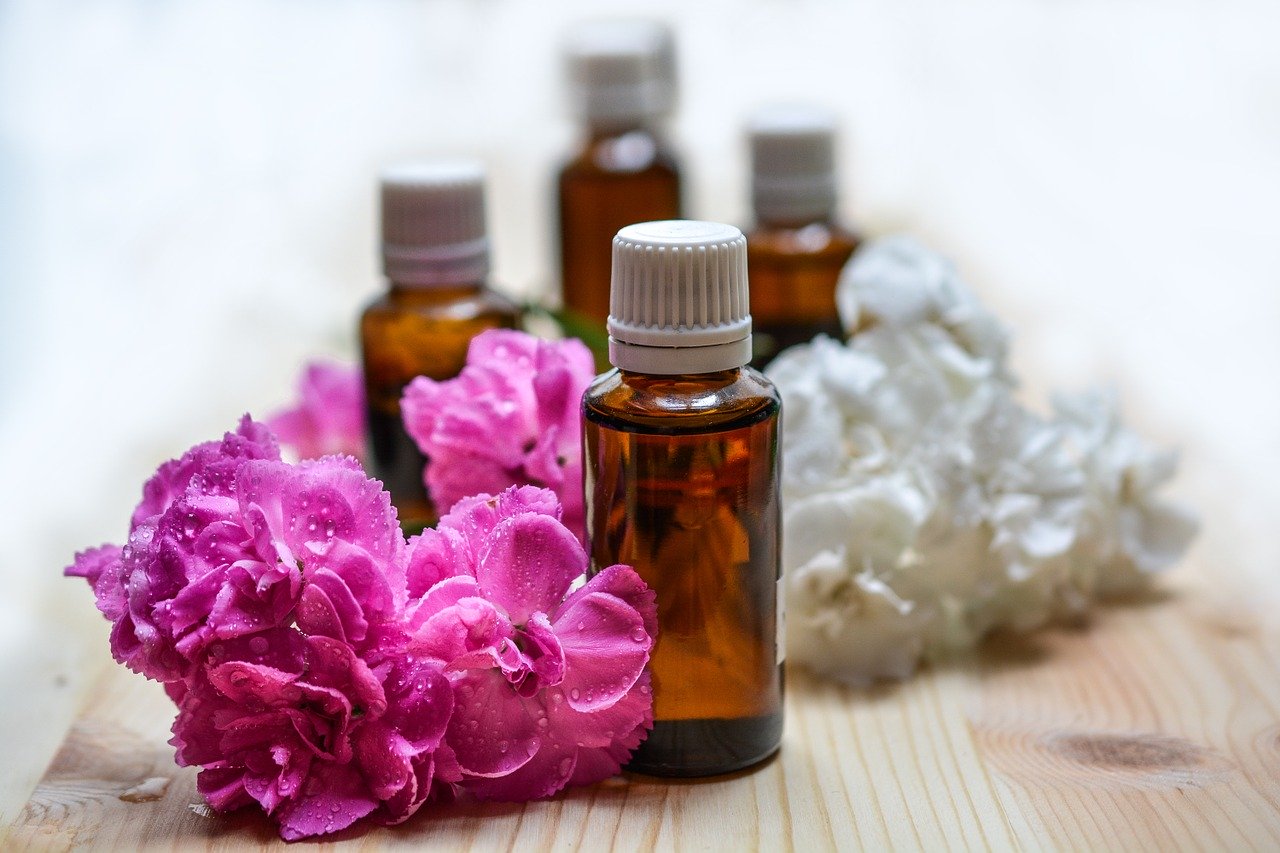
- 1 Teaspoon Essential Oil
- 1 ½ Teaspoons Water
- ¼-½ Teaspoon THC (or CBD) Coconut Oil*
Instructions
Once you’ve gone ahead and gotten ahold of all those necessary ingredients, we can get started on these Homemade Cannabis Bath Bombs.
- To kick things off, let’s toss all of those dry ingredients into a bowl, and mix everything together with the help of a whisk. And really put some effort into it, too. You’ll want to make sure that everything is expertly mixed and mingled with one another.
- At this point, you should grab a small glass measuring cup or container, and mix together all of those remaining wet ingredients. If you’re not sure what kind of container or cup to use, a shot glass would suffice in this situation, as you’re not blending together a terribly large amount of liquids.
- Now, you’ll want to pick up that container (or shot glass) full of your newly-mixed wet ingredients, and ever so slowly, stir them in with the dry ingredients. Make sure to keep that whisking motion going throughout this step. You don’t need to go crazy with the mixing, though.
- In fact, if you begin to notice a bit of “fizzing” starting to take place, ease up a bit on the whisking, and slow that tempo down. That sort of reaction is an indication that you are whisking things up far too fast.
- As you are whisking those things together at the appropriate pace, you may now add in your couple drops of food coloring, for a little added pizzazz.
- Once you’re happy with how everything has been mixed together, you can move on with the next step. You’ll know things are ready to go when they start to take on the look (and feel) of sand at the beach; a bit damp and grainy to the touch.
- If you’d like, there’s a way to test the quality of your bath bomb mixture before moving forward.
- You can place a tiny dollop in your palm, and give it a hearty squeeze of the fist. If the bomb blend adheres itself to your palm in just a couple chunks, that’s the telltale sign of a quality batch. If not, a couple sprinkles of water ought to help it achieve that desired consistency.
- When that is good and ready, you’ll need to grab one of those bath bomb molds.
- Open up those molds, and pour your bath bomb mixture into each half. Don’t skimp here, either. In fact, I’d say you should aim for a little bit of overflow. But let that spill over occur naturally, any sort of pressing down would only damage the final product - so hands off, people!
- Then, you’ll want to strategically press both of those halves together, and hold them for a few moments, to ensure that they are firmly combining themselves into one mega Homemade Cannabis Bath Bomb.
- After that brief amount of time, you’ll want to remove just one of the mold halves from the bomb. Then, place the newly created bomb, mold-side-down, onto a counter.
- You’ll need to give it at least 20 minutes to dry and firm up in this state. After that time period has elapsed, gradually twist off the other end of the mold with the utmost delicacy.
Notes
At this point, once the bomb is free from its mold, you will need to let it rest again to take on its new solid state. In my experience, I’d recommend not touching these suckers for 3 hours or so. That should be ample time for them to adhere to their new firm consistency.
But, after that bit of time has come and gone, you can feel free to toss that Homemade Cannabis Bath Bomb in the tub, slink yourself into the bubbles, and enjoy one of the most relaxing experiences that you’ve ever had.